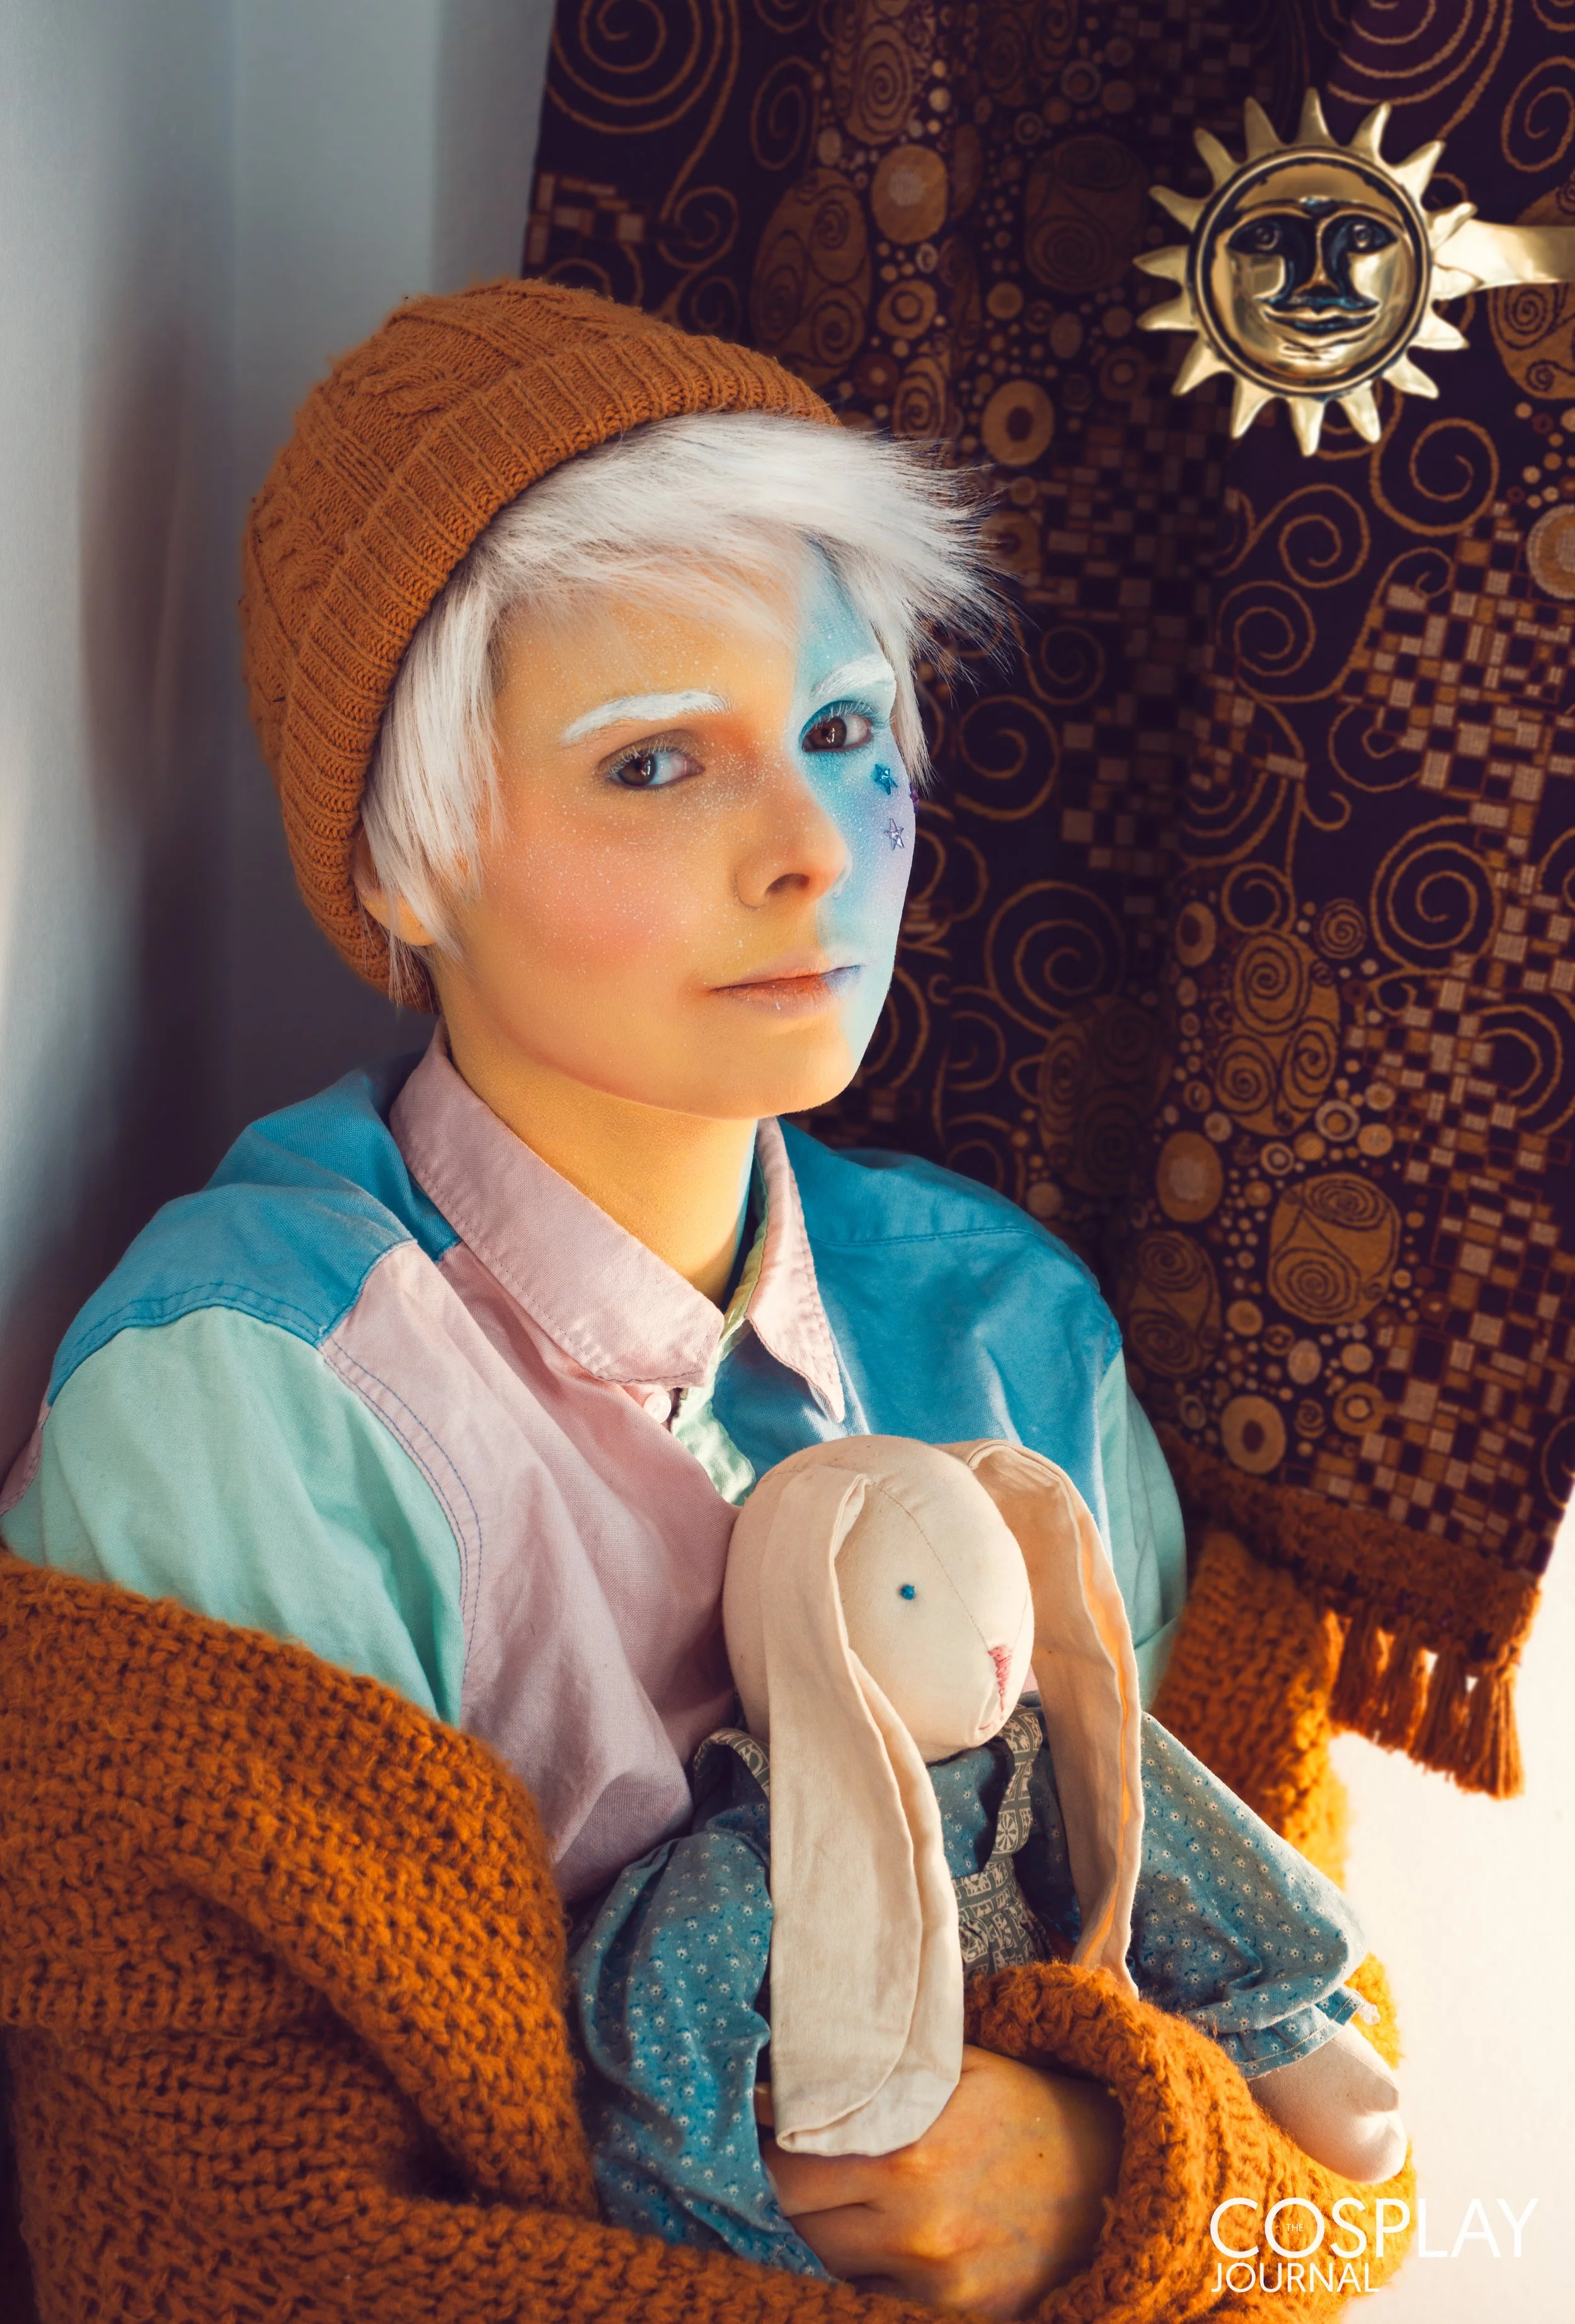
A Cosplayer’s Guide to Posing

Luke Kerrigan/Xanth Cosplay
You have spent the last few weeks to months working on perfecting your new costume, just in time for the convention and you can’t wait to show it off to all your friends and fellow con-goers. Everything is going brilliant, your costume is being really well received and you’re having an excellent time. Then someone asks to take your photo and you suddenly realise you have no idea what to do with your body. We’ve ALL been there.
Well worry no more friends, as I have the ‘Cosplayers’ First Guide to Posing’ just for you!
Like most things with cosplay, posing comes down to practice. That is to say, practice and a general understanding of how to hold your body for a shot, something which is thankfully much easiest to do than it sounds.
Today is all going to be about the very basics of what to do and what to avoid. Many of the examples will be very general but will give you a solid base from which you can play around and really bring through the personality of your specific character.
Basic Standing Poses
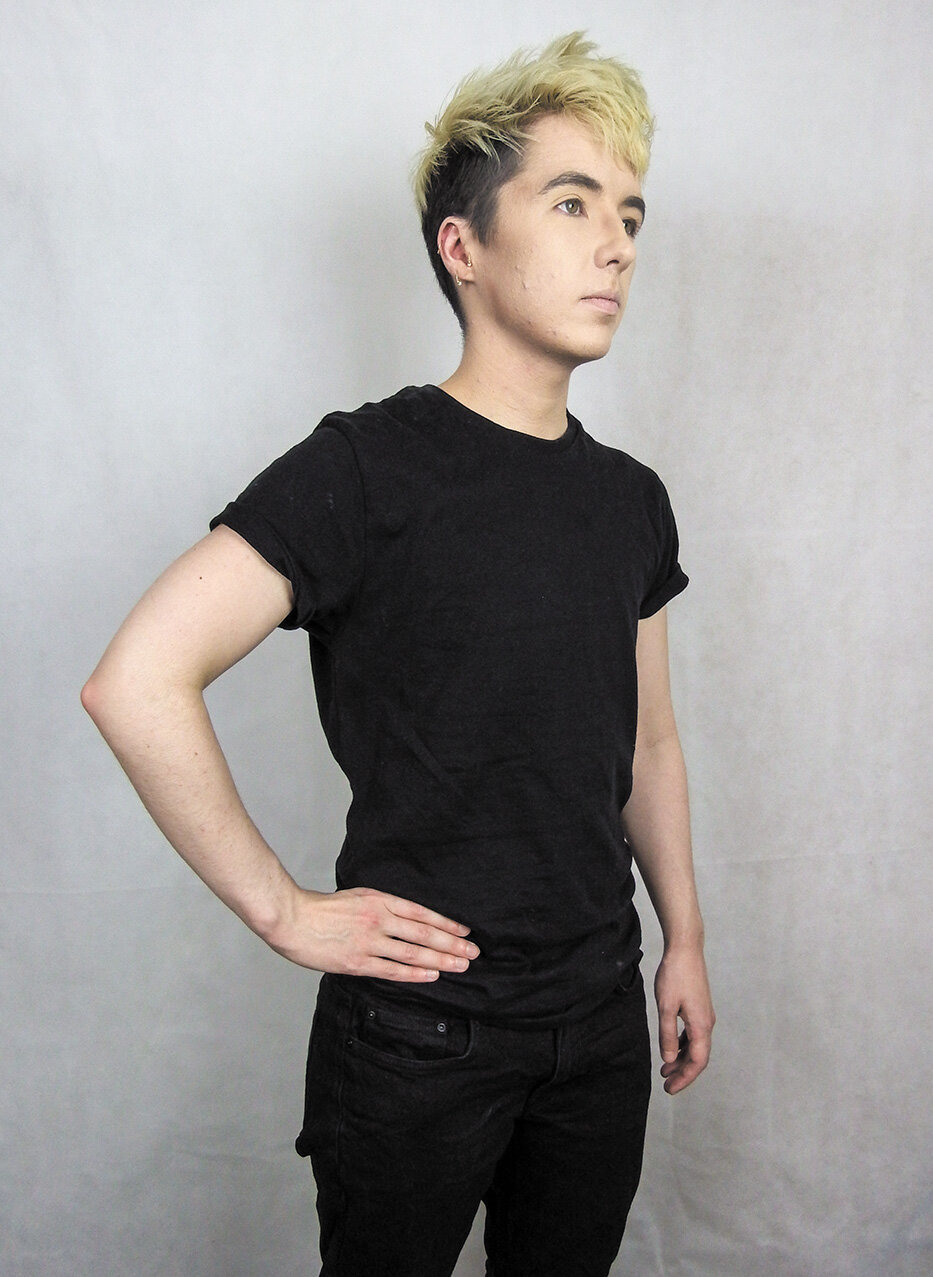
These are the bread and butter of posing in cosplay. The majority of con floor shots and even arranged photoshoot shots tend towards being of your character standing, this is usually because it is the best way to show off the entirety of your costume.
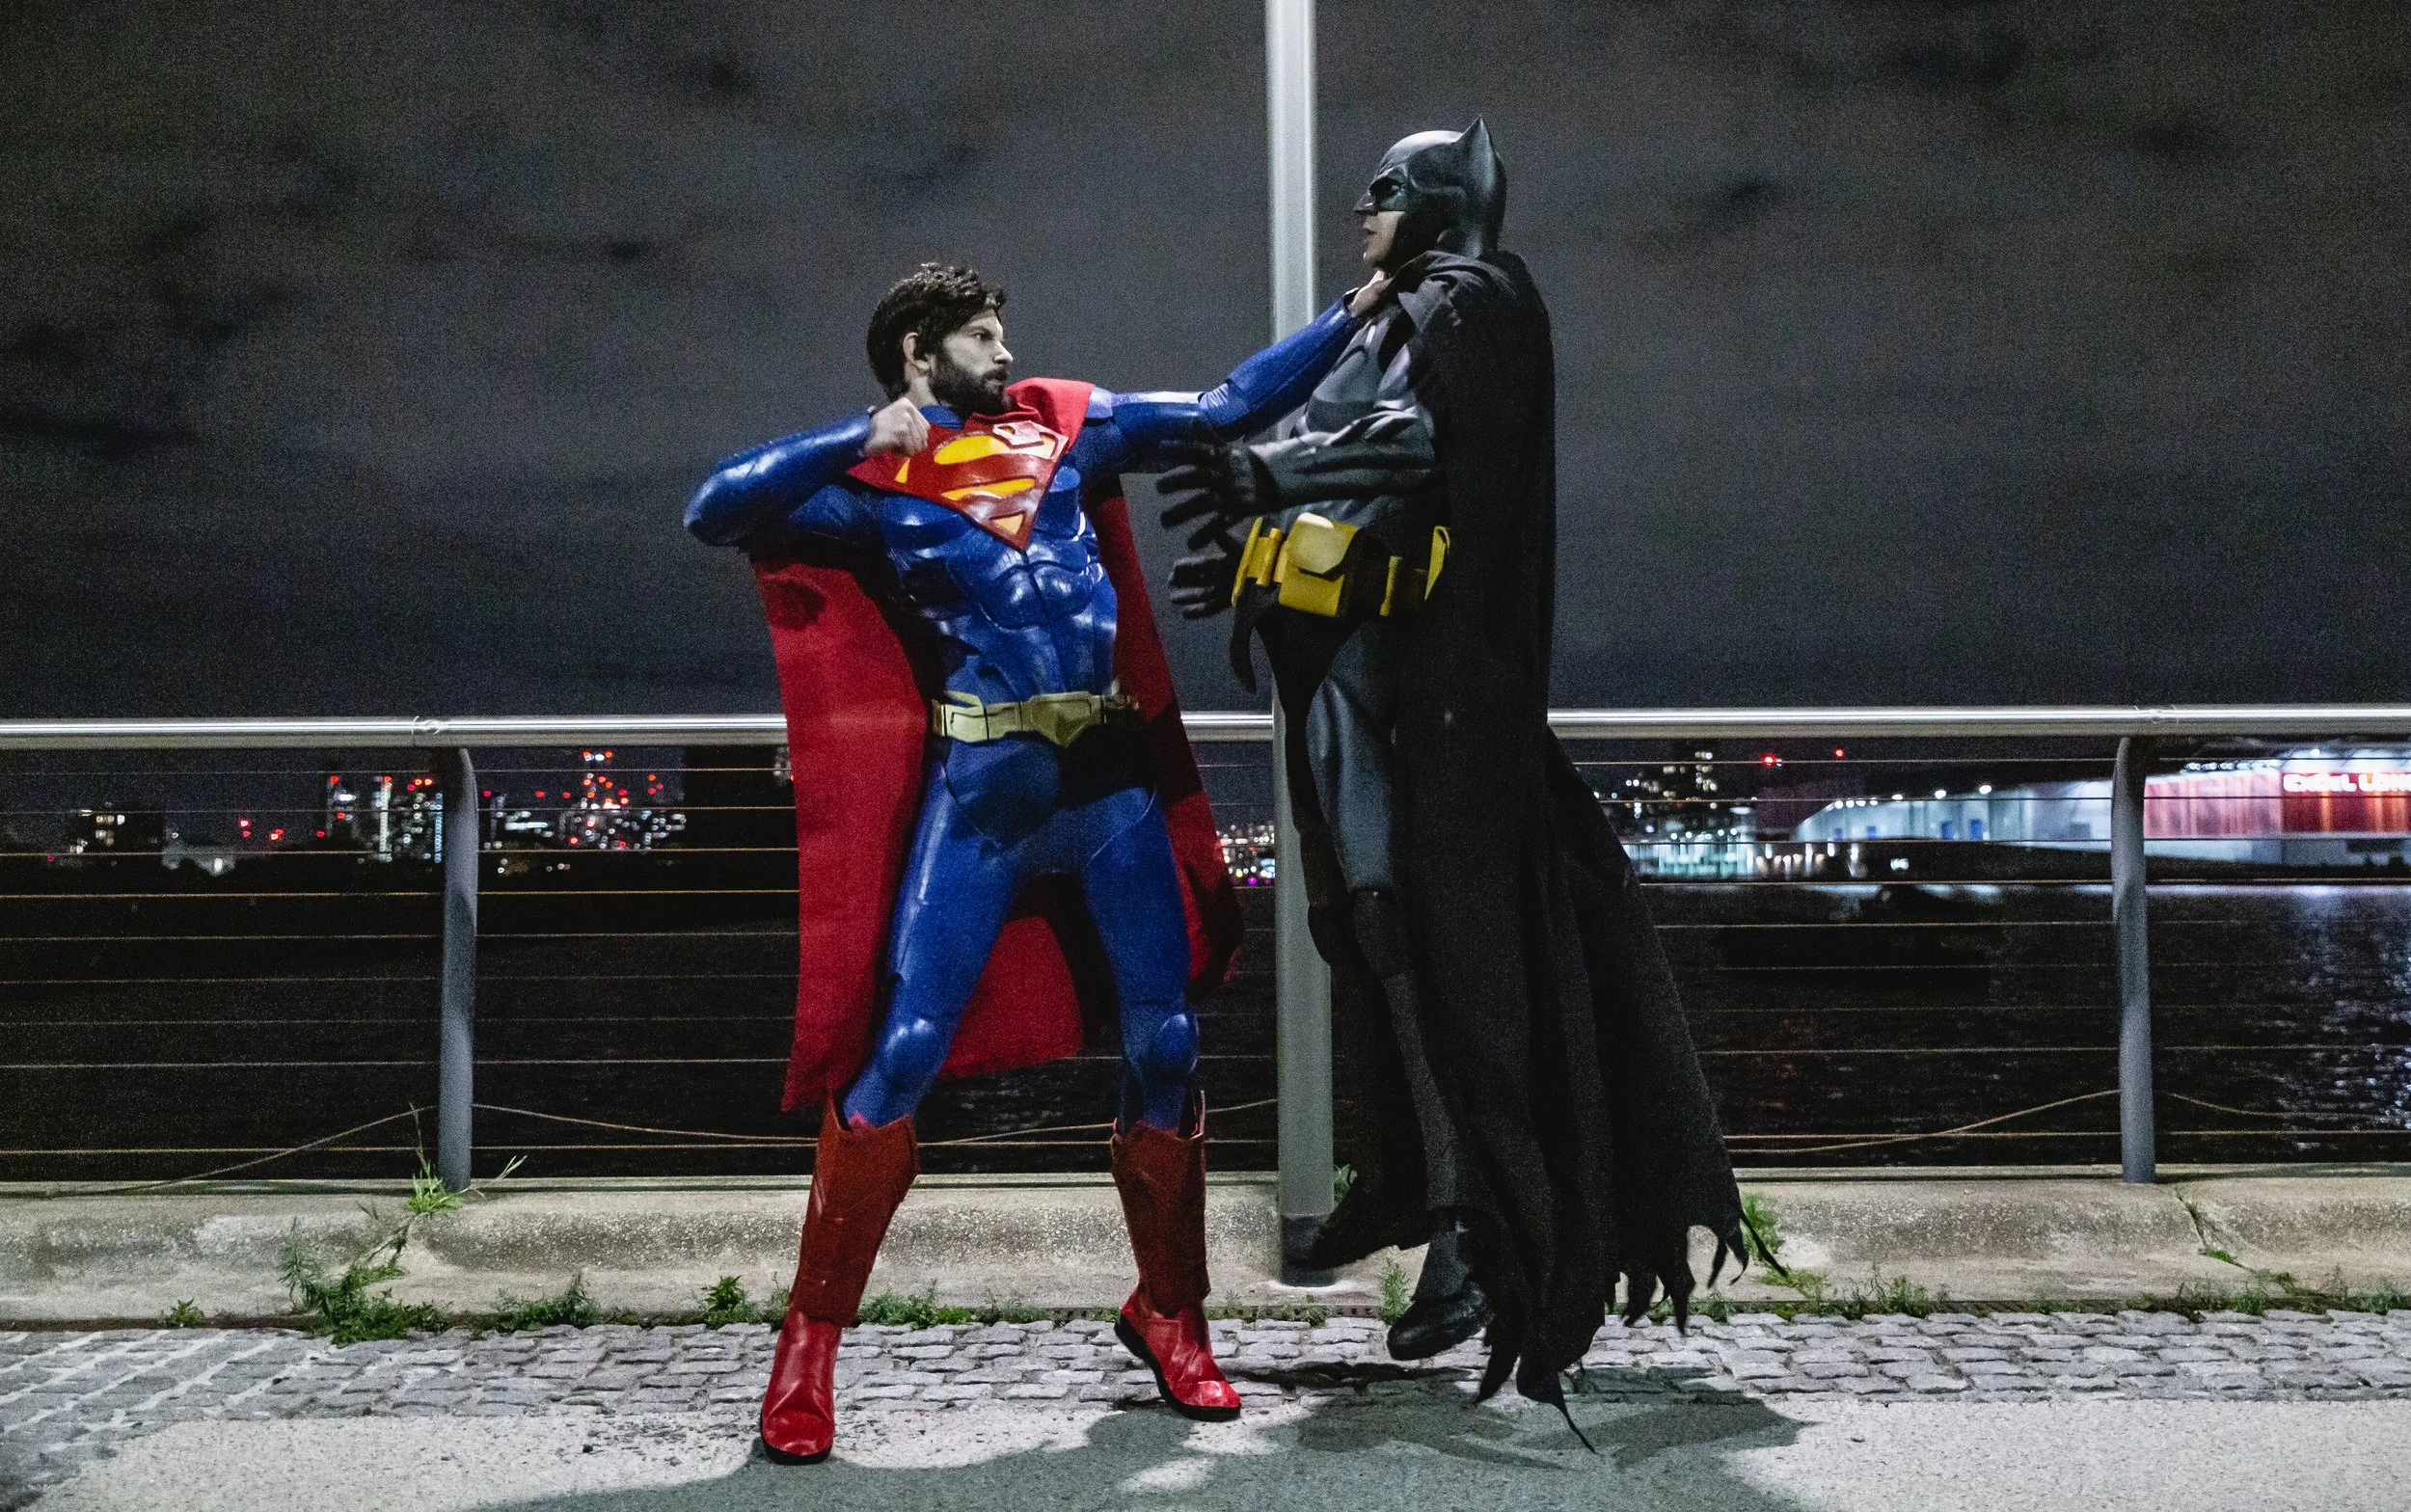
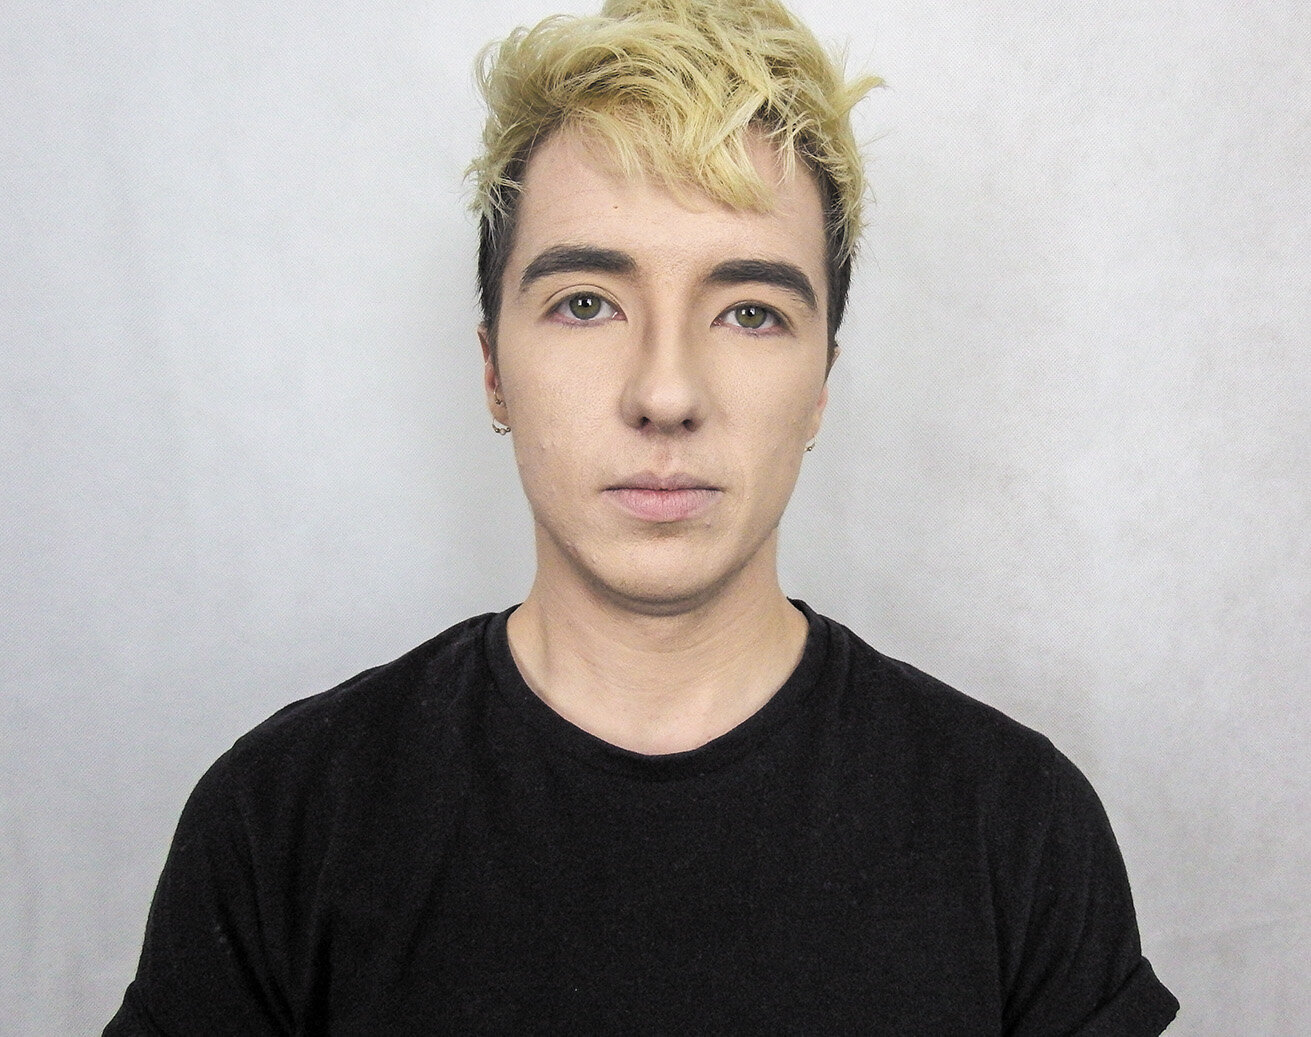
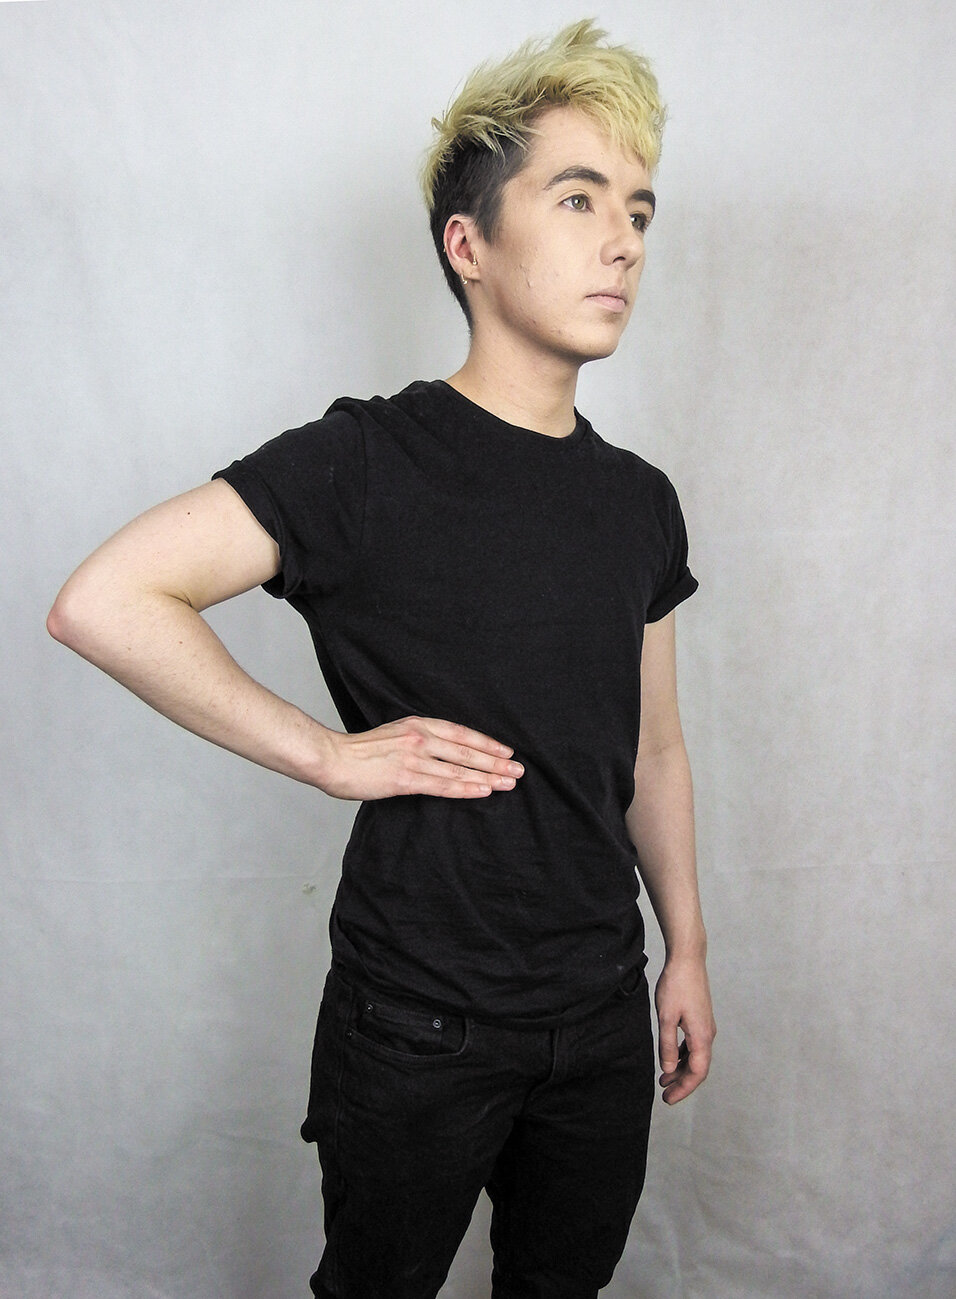
¾ view is your friend.
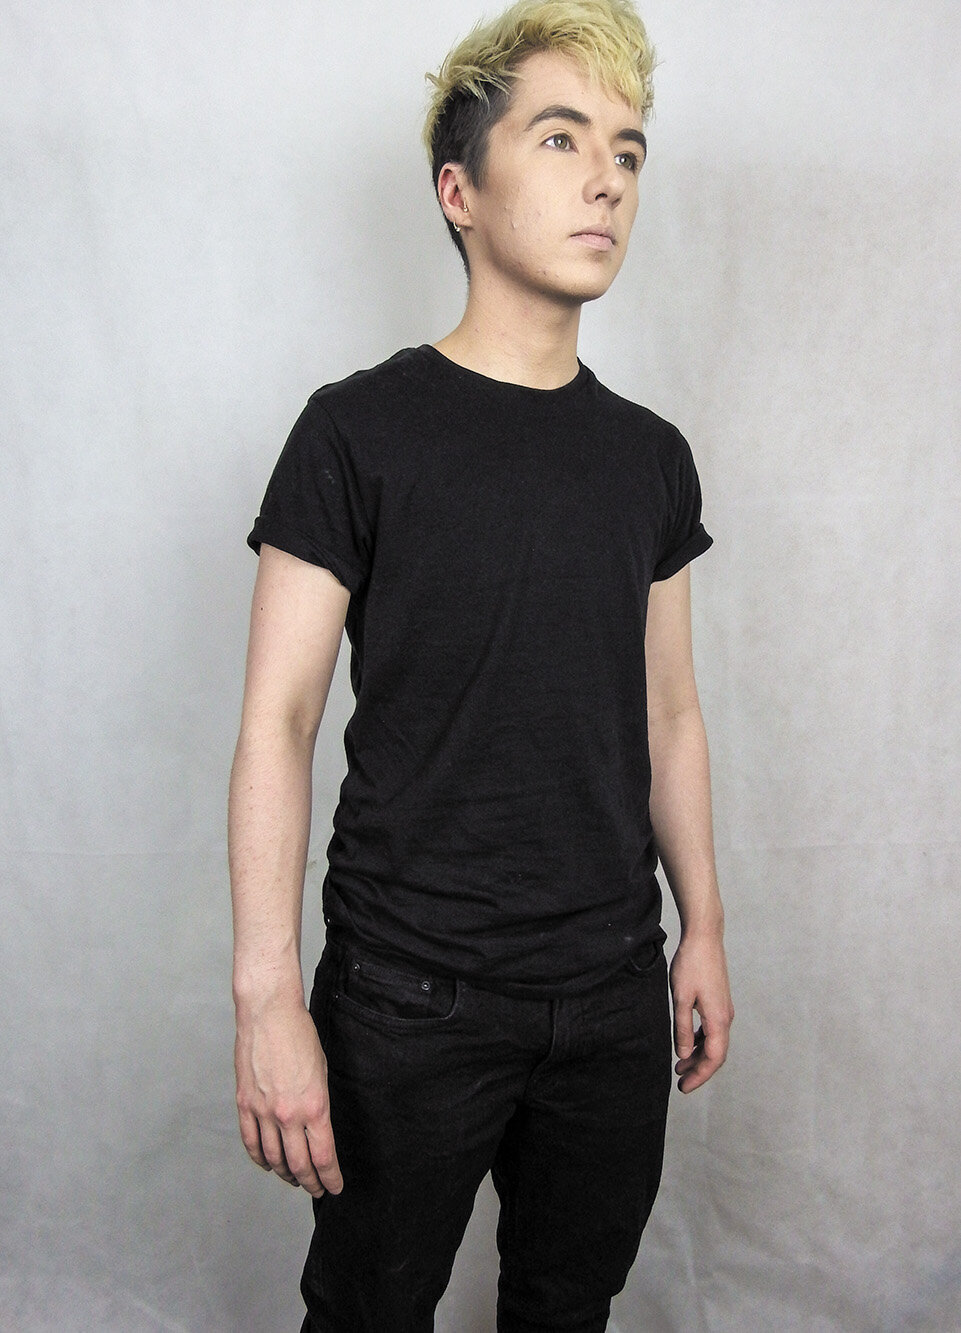
A ¾ view is possibly one of the most flattering angles for someone to view you and your costume from - and it works for just about everyone! Standing at this angle has a very dynamic effect, which has made it very popular with cosplayers and in modelling in general for years.
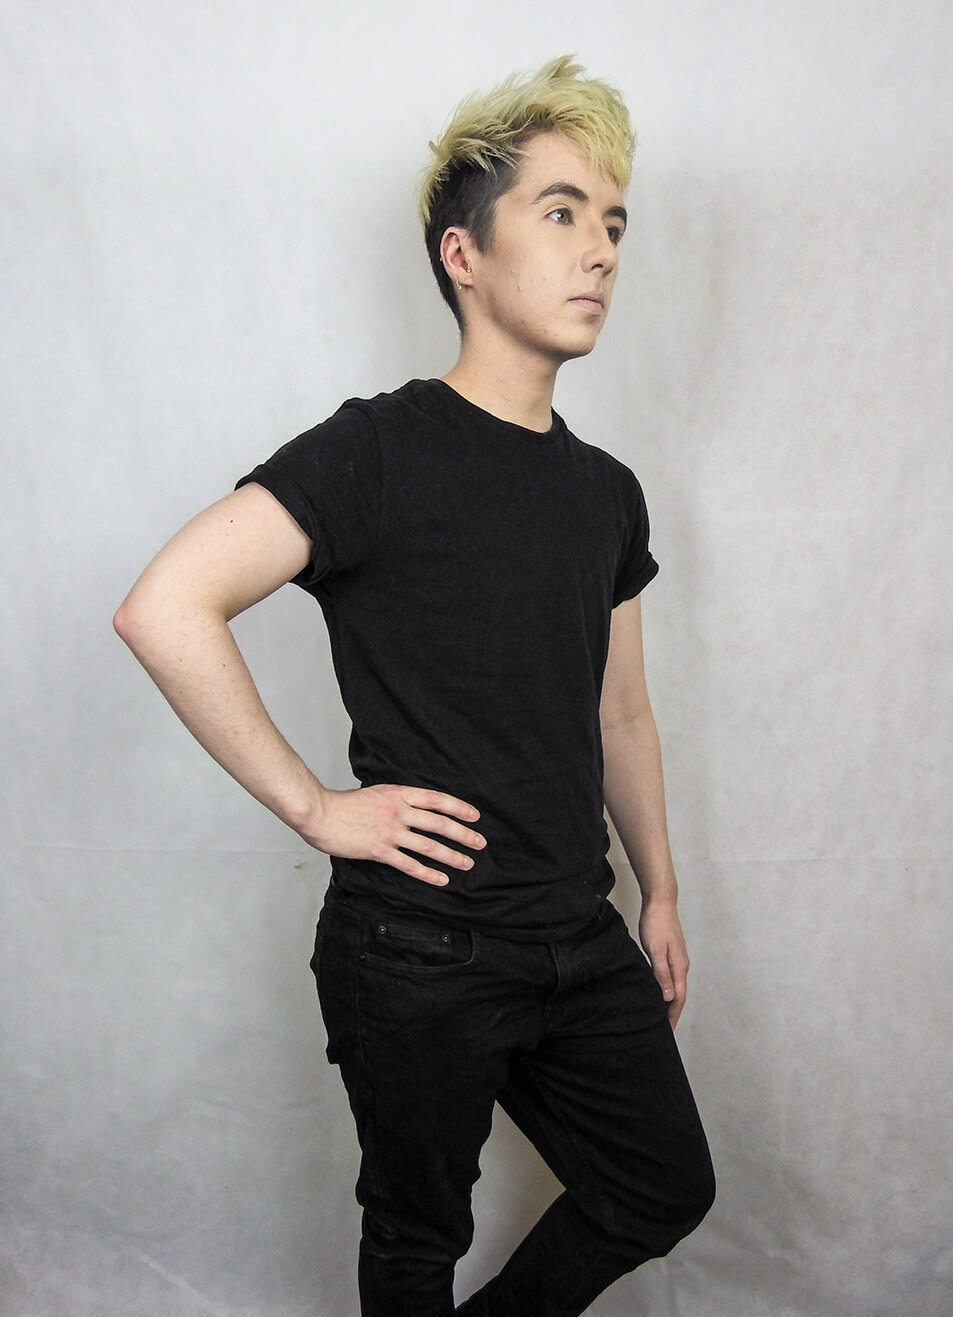
‘Triangles make your poses look dynamic’ was a very popular fad in cosplay posing and photography for a while, and for good reason! Poses where you have bends to your joints will look more natural and tend to appear less awkward and clunky looking.

As a general rule of thumb (there will be some characters and costumes that suit this) try and avoid standing straight on to the camera with your arms floating at your sides. When possible always try and stand with your legs even just a few centimetres apart. Avoid completely obscuring your face.
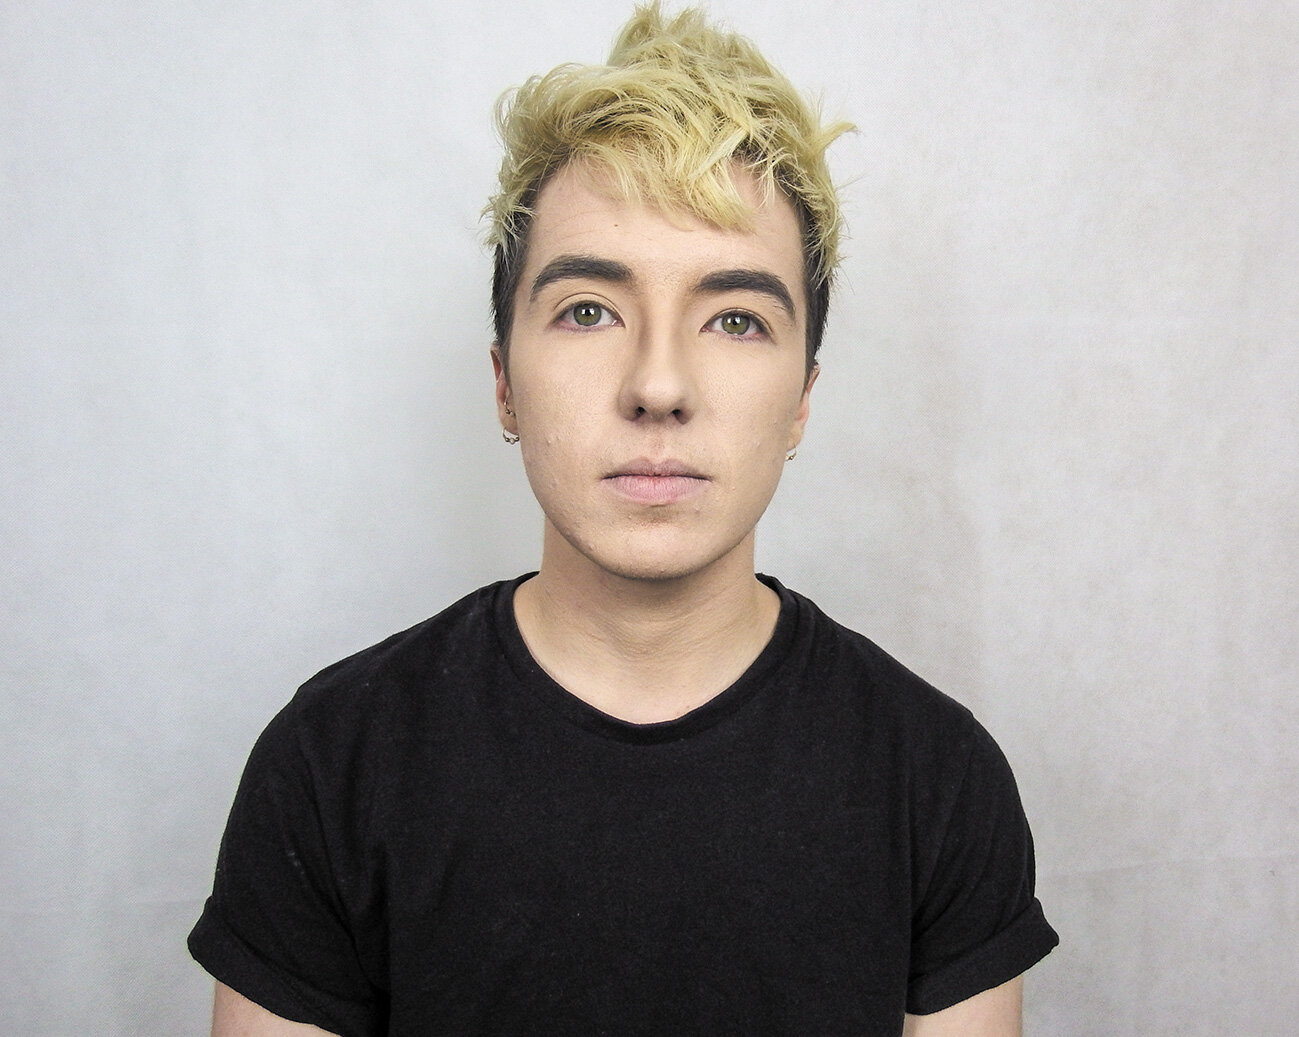
‘Help! How do I ‘face’?‘

Getting facial expressions right for photos can be one of the trickier parts to get down, but again this is nothing that goffing about in front of the mirror, or copious selfies cannot solve. If you are not taking a ¾ view shot then the best thing to do it to look slightly over the shoulder of the photographer, this will save you from staring intensely down the lense of the camera and result in an image where you are still looking forward but still look natural.
Be aware of your eyebrows. Is your character smiling? Are they angry? It’s all in the eyebrows! Practise raising and lowering your eyebrows in the mirror, different combinations work for different people. Personally if I raise my eyebrows too much I start to look terrified which can make for a disconcerting combination if I am trying to convey a ‘happy’ character with the rest of my face! Play around and see what works best for your own face.
The chin trick. This is an excellent little cheat for anyone who is worried about the sudden appearance of a double chin in any of their photos. Best used in front facing or ¾ view shots (as shown in example it looks unusual in profile) this little trick is great for giving you a stronger jawline or hiding a double chin if that is something that worries you.
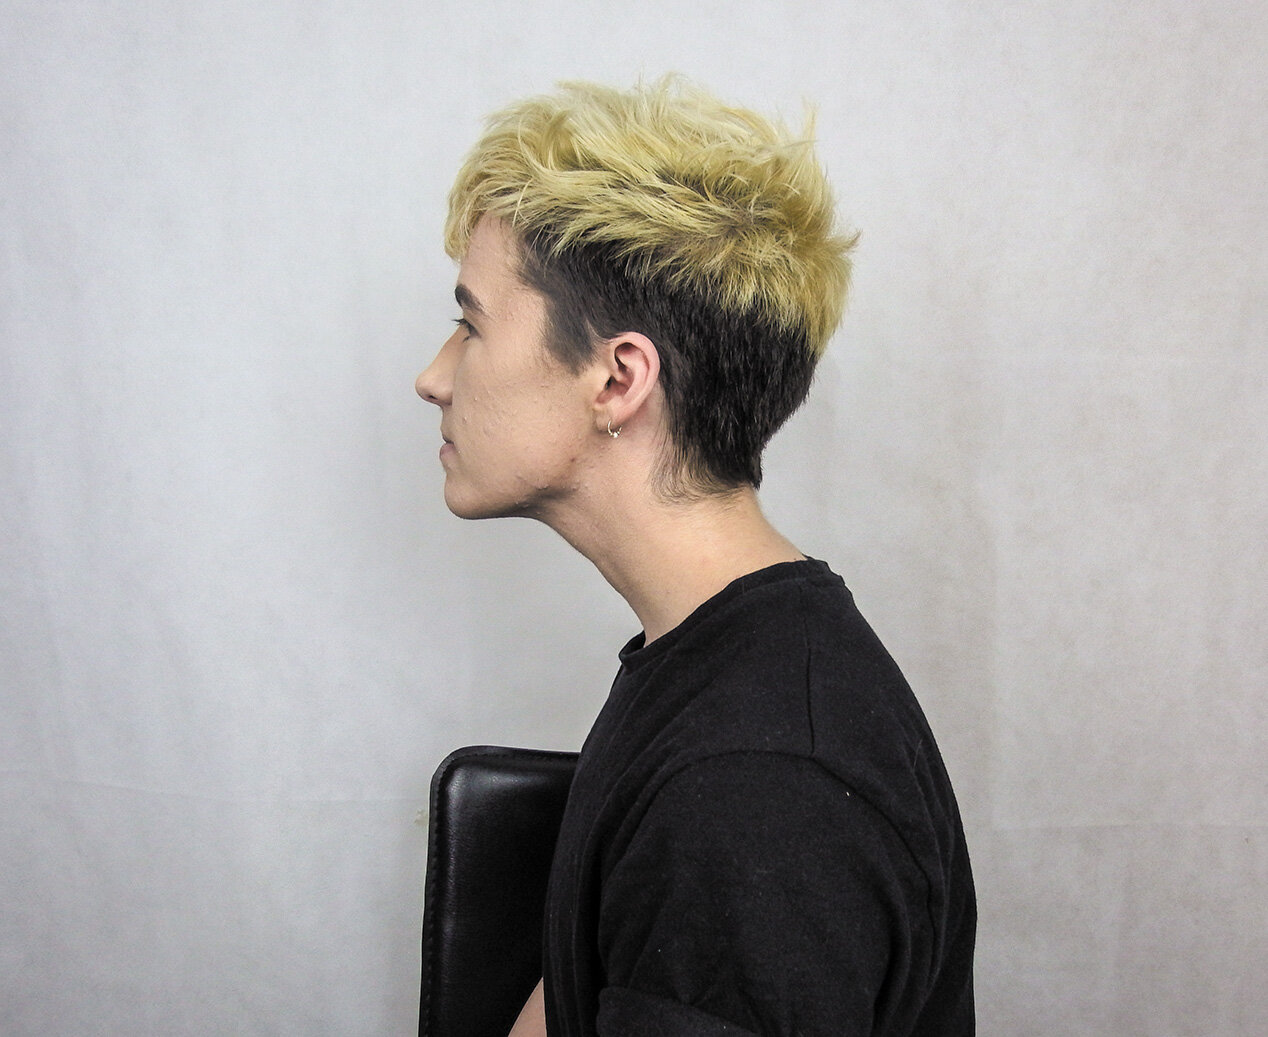
This is super easy to achieve! All you need to do is, while maintaining a straight back, push your head forward while slightly raising your chin. Some people even find that pushing their bottom jaw in line with their top gives an especially chiselled jaw!
Oh no, I forgot I also had hands!
Hands are the worst. Especially if you don’t have props. But if you run with the same basic ideas from the standing poses mentioned previously, keeping your joints loose and making those great triangles for your power poses then you have this in the bag.
Hands on hips. This is a great pose that works for just about any character, but there are different ways of doing it. Think about what part of your body you want to look smallest for your character- this is where your hands go. So for stereotypical female presenting characters you will want your hands just around the bottom of your ribs or on your natural waist. For more masculine presenting characters you will want your hands on your hips.
Handy stock poses. These are good fall backs, they won’t work for every character you do but can be good bounce boards to work off of.

I like to call this one ‘the invisible bannister’. It works great for your regal characters, be they Disney princesses or anime protagonists or villains. Imagine you are holding a small delicate ball in one hand, curve your other hand over the top and roughly over where the waistline of your costume is sitting. Voila!

Let your costume be your prop. Tuck your thumbs in your belt loops, adjust your collar, shoot your cuffs. Remember to try and keep the pose of this one loose, as you can run the risk of looking like you awkwardly have your hands in your pockets

Ideal for Idol cosplayers and all you Yuri on Ice fans out there! Very few things scream ‘anime cosplay pose’ like your hands being up about to touch your face, but poses like this are also gaining popularity with western media costumes too! If you are looking for a pose that suggests elegance or poise then this is a fun one to try out!
Get silly with it! Play around with hand shapes, mix in fun crouches and angles! Remember that it is all about having fun and don’t stress too hard, because at the end of the day, if you are anything like myself, you will be blinking in half of them anyway

Find Luke on Instagram @Xanthcosplay and check out his Dungeons and Dragons Emporium Bardic Inspiration